Lecture recordings with Microsoft Teams and Panopto
For staff on how to use Panopto in Microsoft Teams, map Teams recordings to Panopto folders, and move Teams recordings to Panopto.
Connect the Panopto App to your Teams account
- Follow steps on this page to send all your Teams meeting recordings to your Meeting Recordings folder in Panopto. You can also link Teams recordings to Panopto paper folders.
- You can webcast and record lectures and other sessions directly in Panopto.
- The integration of Teams and Panopto works best on the desktop app version of Teams and is not currently available for mobile devices.
- Unlike Zoom, Teams does not retain a transcript/captions on transfer to Panopto, but you can add automatic captions when you edit the recording. See Panopto captions.
- See also how to Add a Teams meeting link in Moodle.
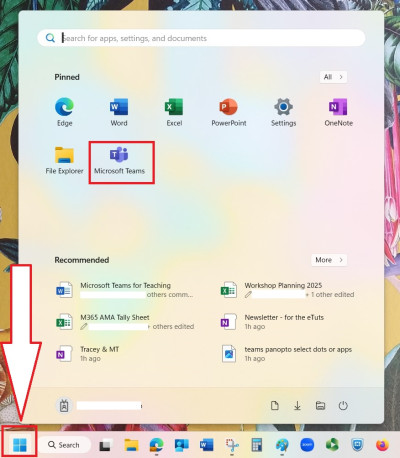
- In your device, open the desktop version of Teams.
-
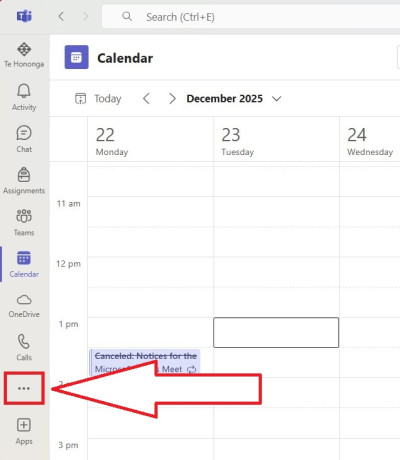
If you don't see the Panopto icon at the left of your Teams screen, select the ellipsis (3 dots).
- In the pop-up window, right-click on Panopto, then select Pin.
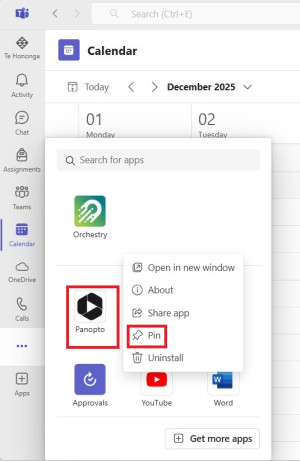
Note: If Panopto is not in the apps list, enter 'Panopto' in the Search for apps box. - At the left of your Teams screen, select the Panopto icon.

-
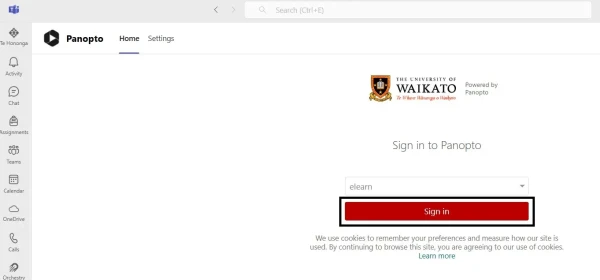
If prompted, log in with your university credentials or select the Sign in button.
-
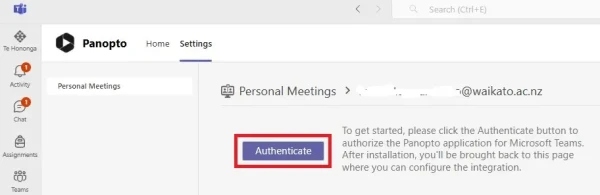
At the top left of the Teams Panopto screen, select Settings.

- Select Authenticate.
Map a Teams meeting to a Panopto folder
-
Select Panopto in your UoW Teams app.
- If prompted, select Sign in. You can now minimise the Panopto landing page and return to the Panopto screen in Teams.

-
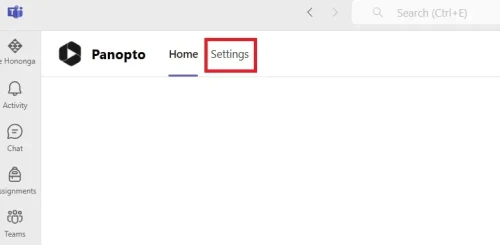
In the Teams Panopto app, select the Settings tab.
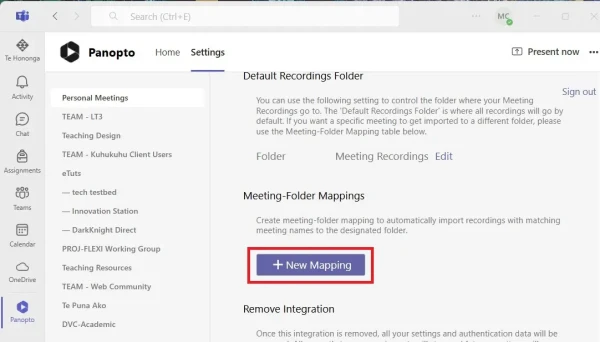
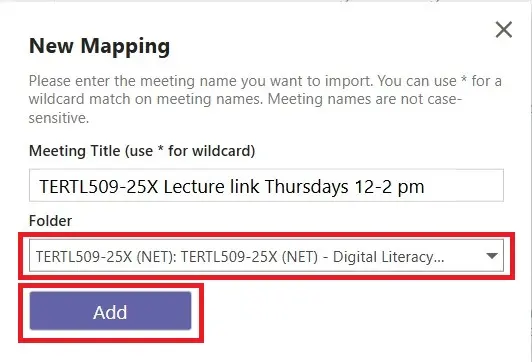
- Select + New Mapping.
- In the New Mapping pop-up window, enter the Meeting Title.
Note:
Panopto uses the exact title in your calendar to find your recordings. A wildcard is available, so you could, for example, use the full paper code followed by * (e.g. TERTL509-25X*).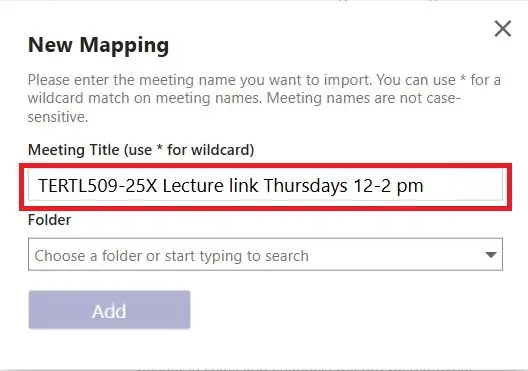
- Enter your Folder name or choose it in the drop-down list, then select Add.
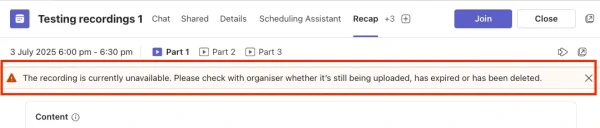
Note: when looking at the recap tab in the calendar event, once the recording has moved to Panopto, you will see this message: "The recording is currently unavailable. Please check with organiser whether it's being uploaded, has expired or has been deleted." The recording will now be in your Panopto folder.
Move a meeting recording from Teams to Panopto
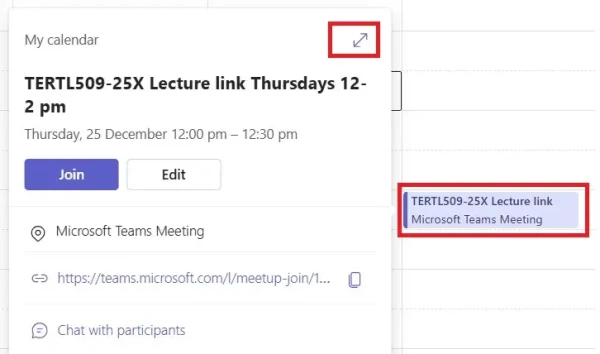
- In the Teams desktop app (see step 1 above), select Calendar.

- Select your meeting, then select the arrows at the top right corner to maximise the pop-up window.
- At the top of the meeting screen, select Recap.
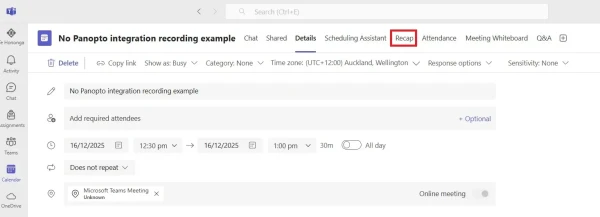
Note:
On smaller screens, select +[number] to display the full menu.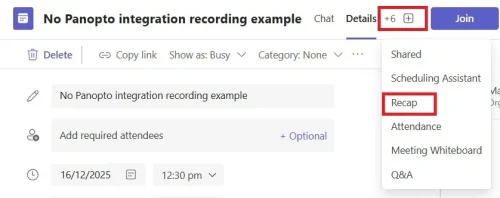
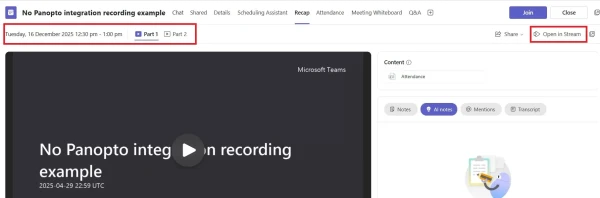
- If you made more than one recording, select the relevant tab above the recording (Part 1, Part 2, etc.), then at the top right of the recap window, select Open in Stream.
- Above the recording, select Download.
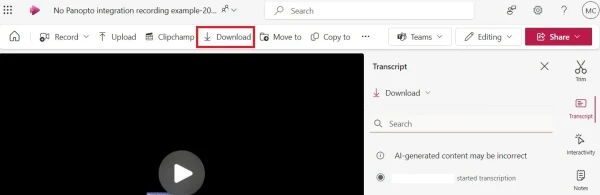
- Find the recording in your Downloads folder, then Upload to Panopto